Feb
21
2014
Bastian Asmus

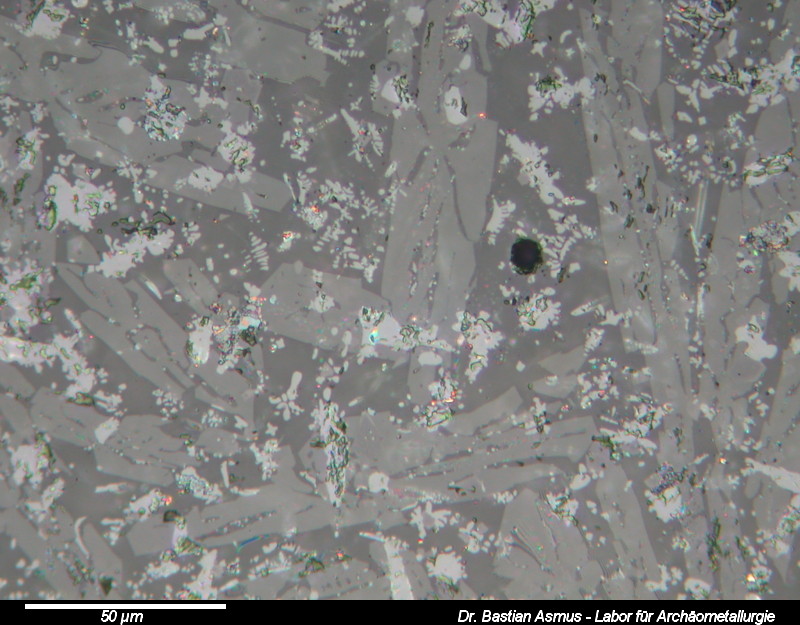
Image width 200 µm, PPL. Medieval copper smelting slag.
The first thing to do is to establish the number of different phases present in the sample. In this case there are five different phases.
If you managed to follow so far, you have now reached part seven part of the slag microscopy course. After sample prep, with find documentation, cutting, mounting, grinding, lapping and polishing we are now going to have a look at the tool to be used for the next sessions: the polarising reflected light microscope, also referred to as an ore microscope. Continue reading
no comments | tags: How to, microscopy, slag | posted in Analysis, Archaeometallurgy, Microscopy, reflected light microscopy, Science, slag
Jan
29
2014
Bastian Asmus

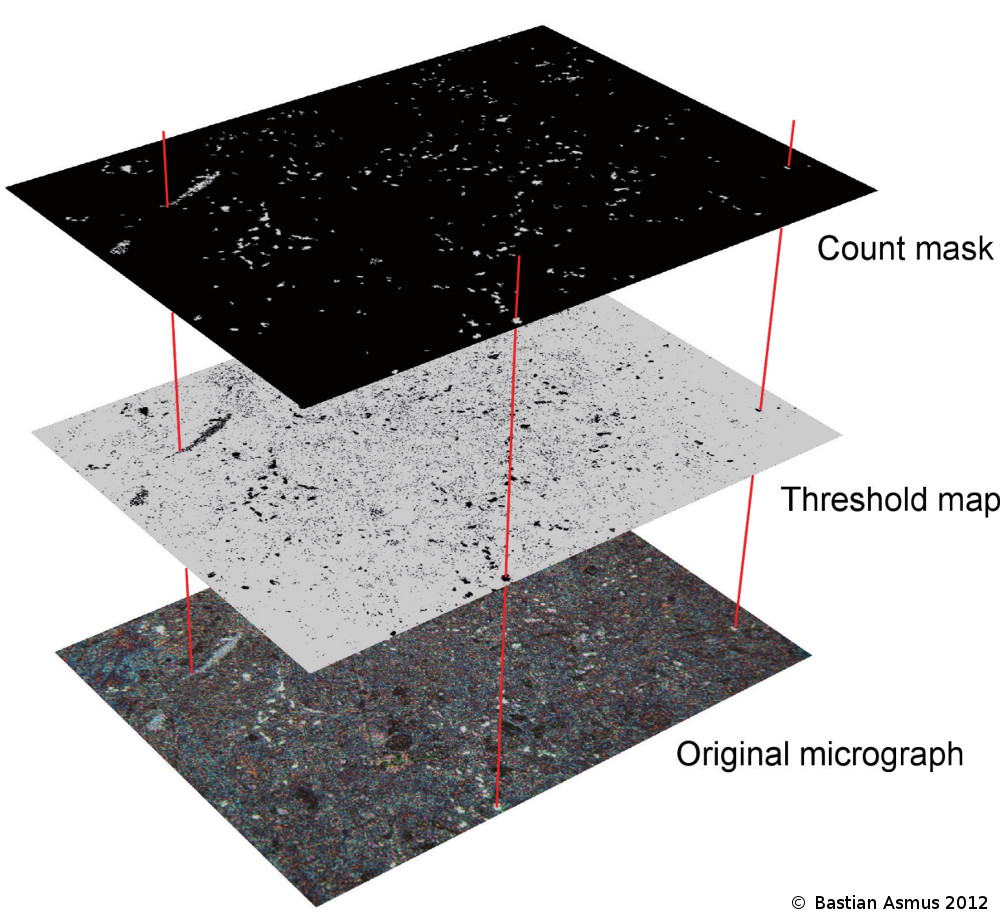
Fig 1: The use of scientific image processing software allows to quantify the area proportion of each phase in optical micrographs. This is a two step process. The original micrograph is converted to a “threshold map” by modifying the colour channels of the source. The resulting black and white image is analysed for their respective area proportions. The count mask is then produced after quantification and may be used to verify which inclusions have been counted.
 I used this method during my PhD thesis to approximate the chemical composition based on a micrograph .
A traditional method for the quantification of an alloying element in another is the estimation of the carbon content of a steel sample. The area of carbon inclusions is estimated by comparison with known standards, or better by measuring them. Area proportions are believed to represent volume proportions and need to be multiplied with the density ρ to calculate wt% proportions. Continue reading
no comments | tags: How to, photograhpy | posted in Analysis, Archaeometallurgy, General, Micrograph, Microscopy, reflected light microscopy, Science
Jan
22
2014
Bastian Asmus


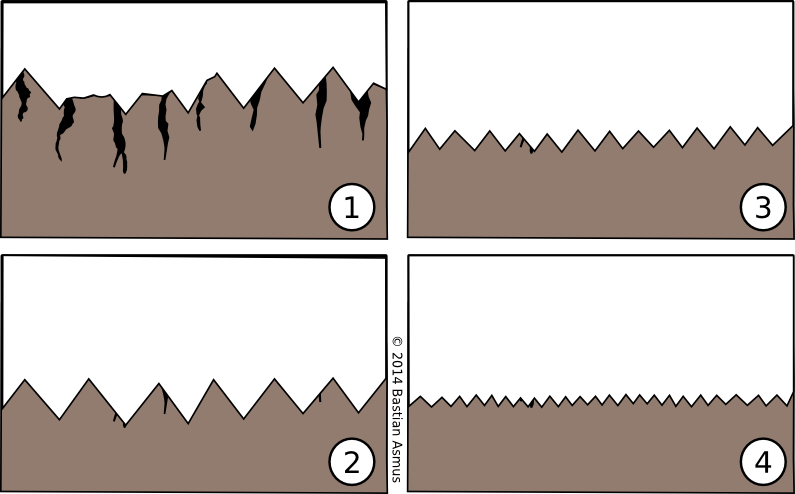
Highly magnified schematic view of a cross section through a sample during the grinding process. Grinding serves two purposes, first to remove micro-shattering caused by cutting (1 and 2), second to prepare the surface for polishing (3 and 4). With consecutive smaller grits you have to remove the scratches left by the previous grit.
Hello to part four of the slag microscopy series. After mounting, it is about time to start sample grinding to prepare the section for polishing.
For this we need:
- a sample polisher/grinder
- abrasive discs
- optional: stereo-microscope to inspect grinding progress
- optional: a marking gauge
Polished section needs to flat. Bottom and top surfaces of the section have to be plane-parallel. A good polish is only achievable if the surface has undergone adequate preparation. This is done by grinding on a horizontal water lubricated abrasive disc. Flatness is usually achieved with abrasives bonded on paper, in synthetic materials or in metal. Continue reading
1 comment | tags: How to | posted in Archaeometallurgy, Lab work, Microscopy, reflected light microscopy, slag


