how to do slag microscopy – sample grinding

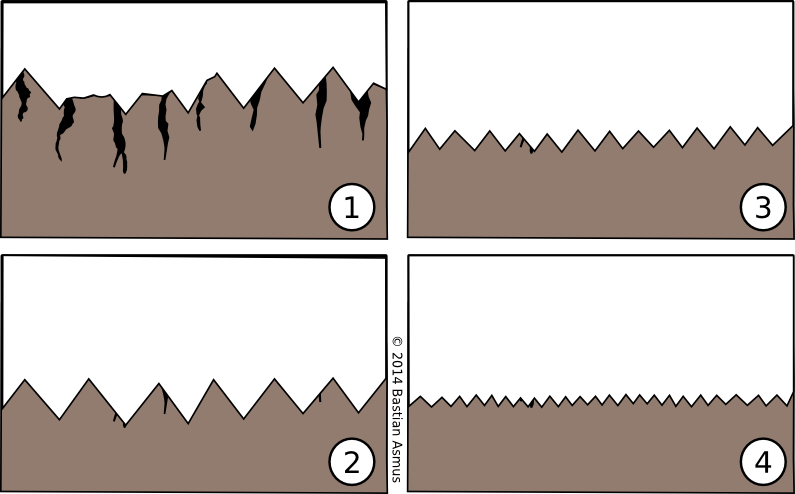
Highly magnified schematic view of a cross section through a sample during the grinding process. Grinding serves two purposes, first to remove micro-shattering caused by cutting (1 and 2), second to prepare the surface for polishing (3 and 4). With consecutive smaller grits you have to remove the scratches left by the previous grit.
Hello to part four of the slag microscopy series. After mounting, it is about time to start sample grinding to prepare the section for polishing.
For this we need:
- a sample polisher/grinder
- abrasive discs
- optional: stereo-microscope to inspect grinding progress
- optional: a marking gauge
Polished section needs to flat. Bottom and top surfaces of the section have to be plane-parallel. A good polish is only achievable if the surface has undergone adequate preparation. This is done by grinding on a horizontal water lubricated abrasive disc. Flatness is usually achieved with abrasives bonded on paper, in synthetic materials or in metal.
Within the last 50 years there has been an amazing development of abrasives for sample preparation. Generally there are silicon carbide (SiC), corundum, and diamonds which are suitable as abrasives. It is far beyond the scope of this introduction to even list all the various approaches to sample grinding.

For optimal results samples maust be ground to be flat and possess plane-parallel top and bottom faces. Wedge shaped and/or convex samples are no good.
Grinding samples
So here is what I’ll do: I will only talk about the simplest way to arrive at fine quality surfaces with simple silicon carbide paper discs and manual grinding and polishing. If you have understood these basics it is easier to move on to automatic grinders/polishers. SiC paper possesses bonded SiC crystals on its surface. SiC discs are multi-purpose and can be used on slag, ore and metal with equal success. They are comparatively cheap and easy to handle: once they are blunt you take the next paper disc.

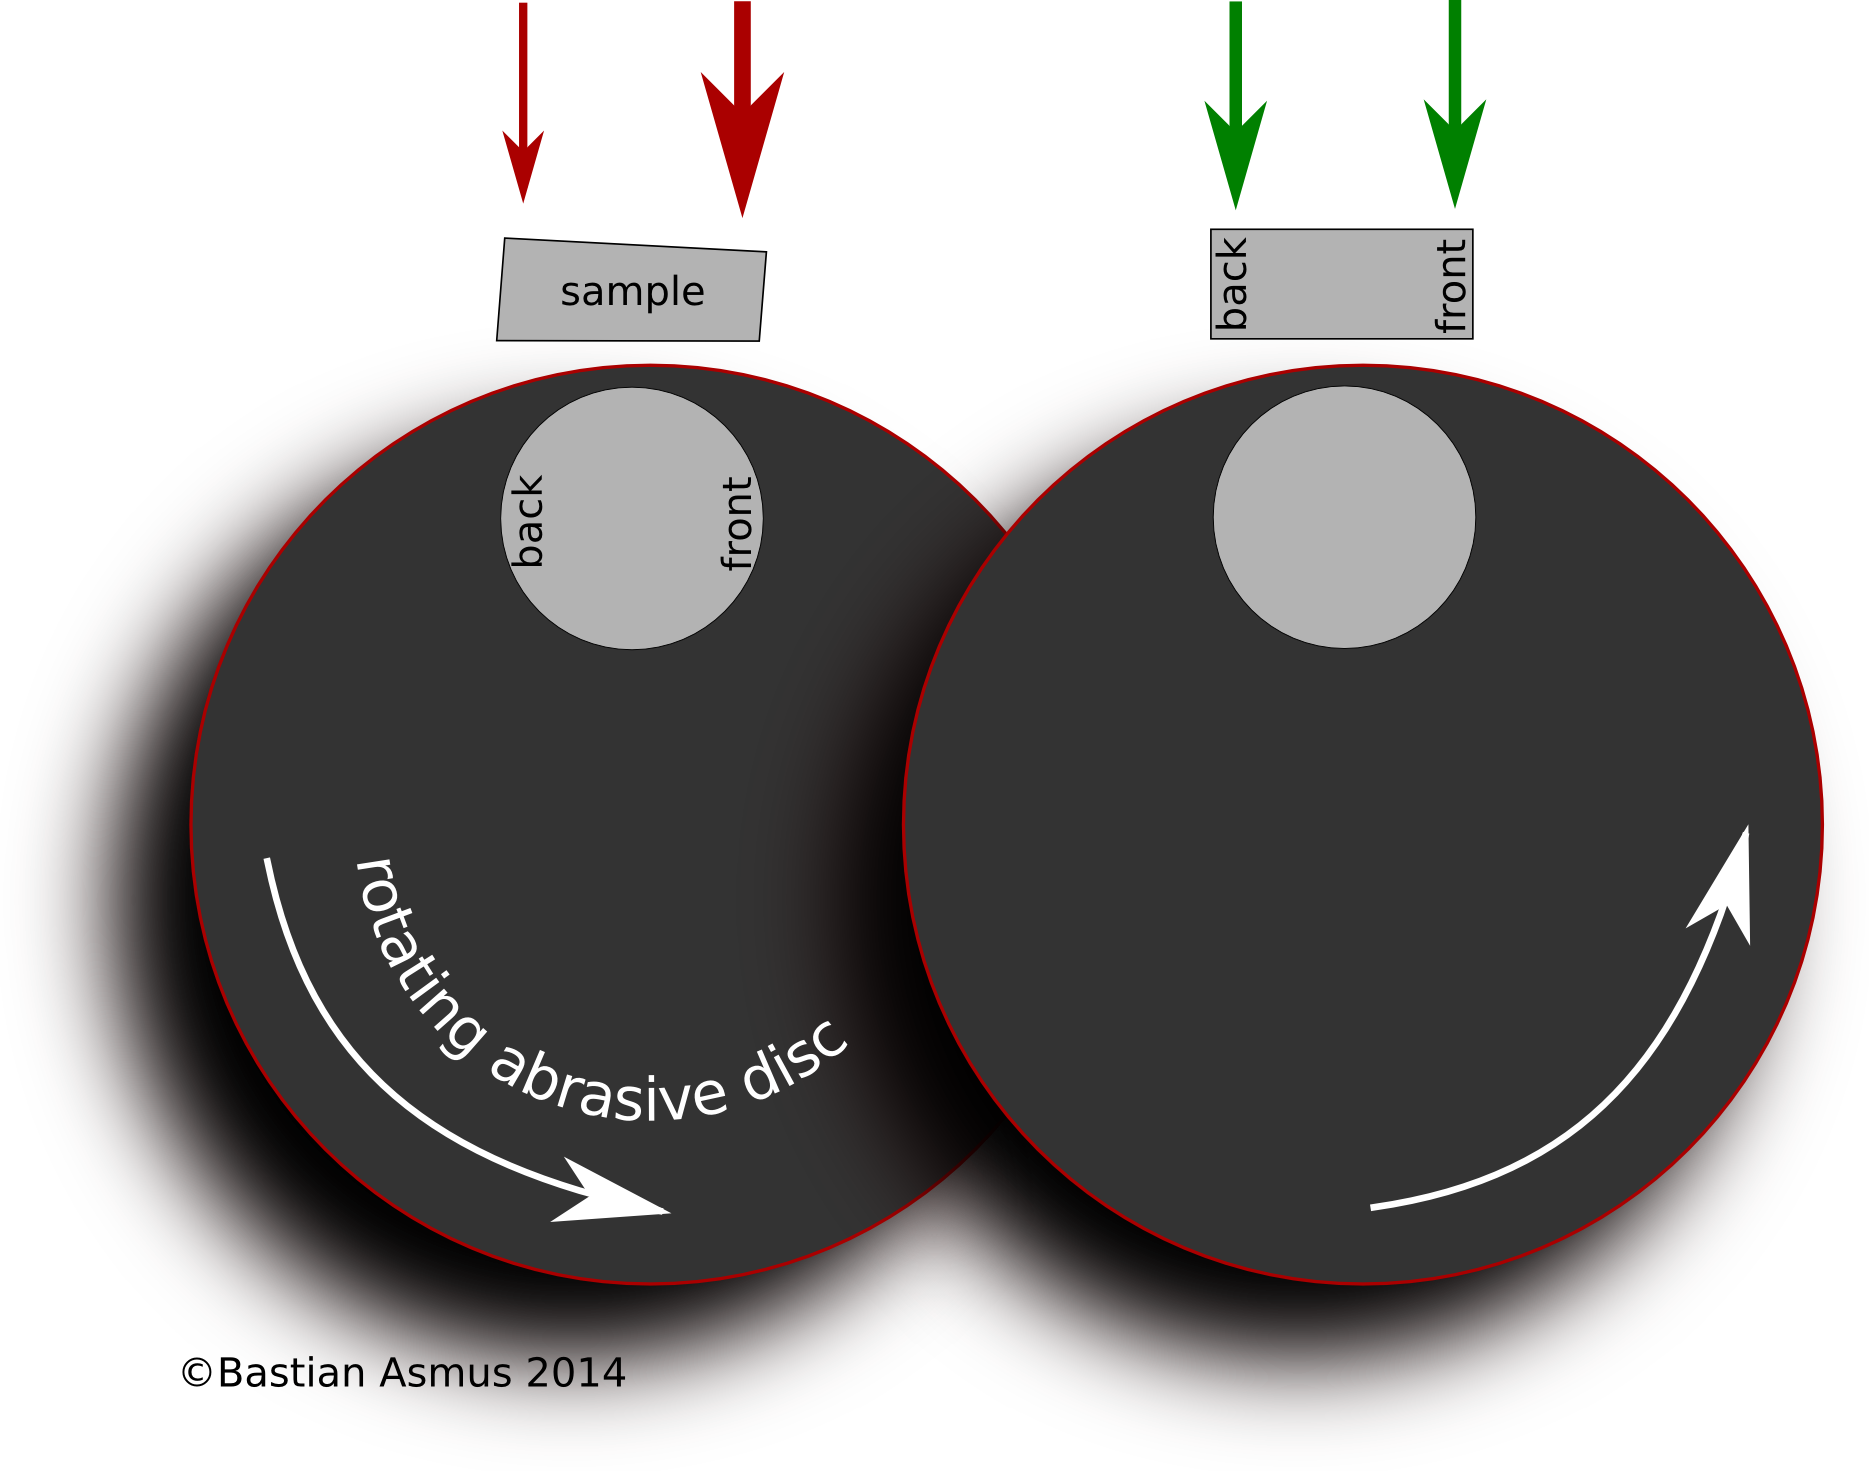
On the rotating grinding disc, the front of of the sample will abrade faster than the back of the sample. This is why you create wedge shaped sections fairly easy. Make sure you apply the same amount of pressure to the front and back of the sample.
Start with grit 120, or 80 grit paper if you need to remove a lot of material and grind the section until it is flat and exposed all over the sample area. This is why it is a good idea to start with flat sample material in the first place. Sometimes there is quite a thick layer of resin on the sample.
Make sure to apply the same amount of pressure with each finger. If not, you will end up with a convex surface, which is no good at all. Rotate the sample about 90° every 15 to 30 seconds. This will also reduce the risk of producing wedges. However, if your pressure on the sample is too imbalanced you may end up producing a nice dome shaped surface, which is worse than the wedge…
Once you are sure the sample has been ground long enough to have removed all the traces of micro-shattering it is time for the next grit: as a rule of thumb simply double the grit number, i.e.: 120, 240, 400, 800, 1200, 2000, 4000
How to make perfect plane-parallel sections

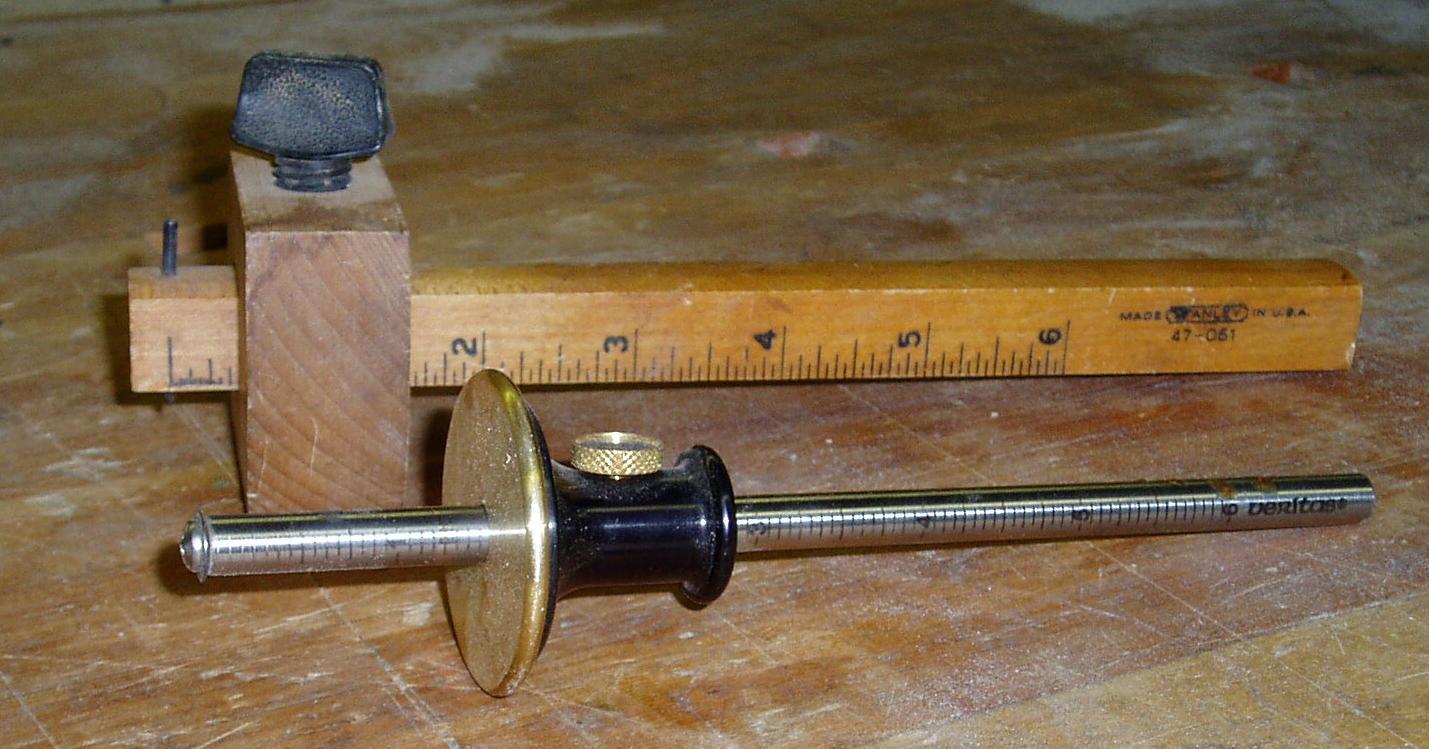
Use a marking gauge to draw plane-parallel line to the top surface. Wooden marking gauges are less prone to leave scratches on already polished sample surfaces.
I am sure you have seen these, too. Perfectly plane-parallel sections. Sweet to work with, there is no need for constant re-focussing during your microscope sessions, you’ll get good results from your SEM-EDS/WDS system? And still you wonder, how can I make that work in my lab without an automatic polishing/grinding machine? You seem to produce wedge shaped sections and can’t help it?
It is easy to rectify this with a simple woodworker’s tool: the marking gauge
Use it to make a small line around your sample block near the face, that does not expose the sample material. Put the block on your grinder and grind down to that line and you are done. See, dead simple.
Or oyu can use a lathe if you do have access to one. The very small and cheap ones do the job well enough.
Check the grinding process with a stereo-microscope

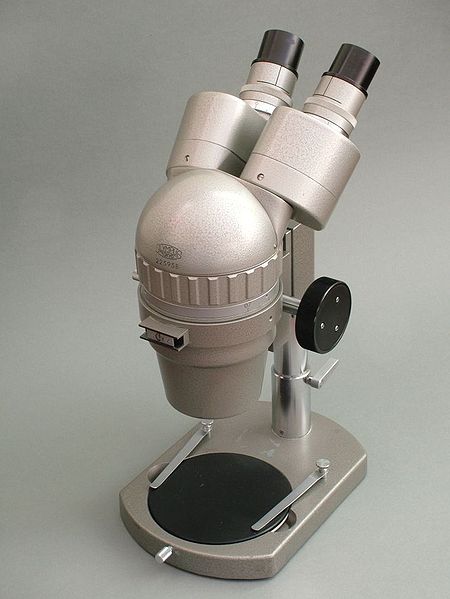
Use a stereo microscope to inspect the progress of sample grinding. It’ll help to cut down on grinding time.
It is good practice to check your sample under a stereo-microscope and look at the scratches the paper made. These scratches we will remove with the next grit. It will require more time for each step to remove all scratch marks from the previous paper, because our abrasive is getting smaller and smaller. You can check your progress by inspecting the section with a stereo microscope. This will assist you to cut down on grinding time, as you become more used to the grinding of materials with similar properties. After grit 1200 you can think of switching to lapping/polishing. You may also go on to grind to grit 2000 or even 4000.
Adhesion on finer grits
With grit 4000 you should be mindful of the strong adhesive forces, caused between the finely lapped surface of the sample and grinding disc: The sample may be pulled from your grip, destroying the paper disc in the process. Also parts from the sample surface may pulled from it behind marred . Use sufficient water lubrication to prevent this from happening.
A word on grit sizes
There are a lot of different grit size standards around: FEPA, CAMI, ANSI, JIS R6001, and micromesh MM, to name but a few. The most important one in Europe is FEPA. I am not going to talk about any of the other. Just check their grain sizes for a comparison. There is however a decisive difference in particle size between FEPA P, for paper and FEPA F for loose abrasive powder. Grain size of FEPA F 1200 is not equivalent to FEPA P paper. FEPA F 1200 is a grain size of 3 microns whereas FEPA P 1200 is grain size of 15 microns!
Here I compared various grit sizes, download the open document spreadsheet if you like. The only thing that is really important to know, is the grain size of the last paper you are using. Let’s assume you stopped grinding at 1200 grit (FEPA P). This translates to a grain size of the abrasive grains of more or less 15 microns. This means you can start polishing with 6 microns. If you switch from grit 2000 with a grain size of 10 microns , you can start polishing with 3 microns.
Recap
- start with grit 120 or 180, depending on your sample
- whilst grinding rotate the sample every 15 to 30 seconds by 90°
- start with grit 80 if you have to remove a lot of material
- change then to grit 240, 400, 800, 1200
- grit 2000 and 4000
- each paper removes the scratches left by the previous grit
- usually the finer the grit the longer to grind
- check the sample surface during grinding with a stereo microscope
- it is the grinding step that ensures flatness of the section
That’s it for today. Hope there was something in it for you.


February 21st, 2014 at 22:01
[…] part of the slag microscopy course. After sample prep, with find documentation, cutting, mounting, grinding, lapping and polishing we are now going to have a look at the tool to be used for the next […]