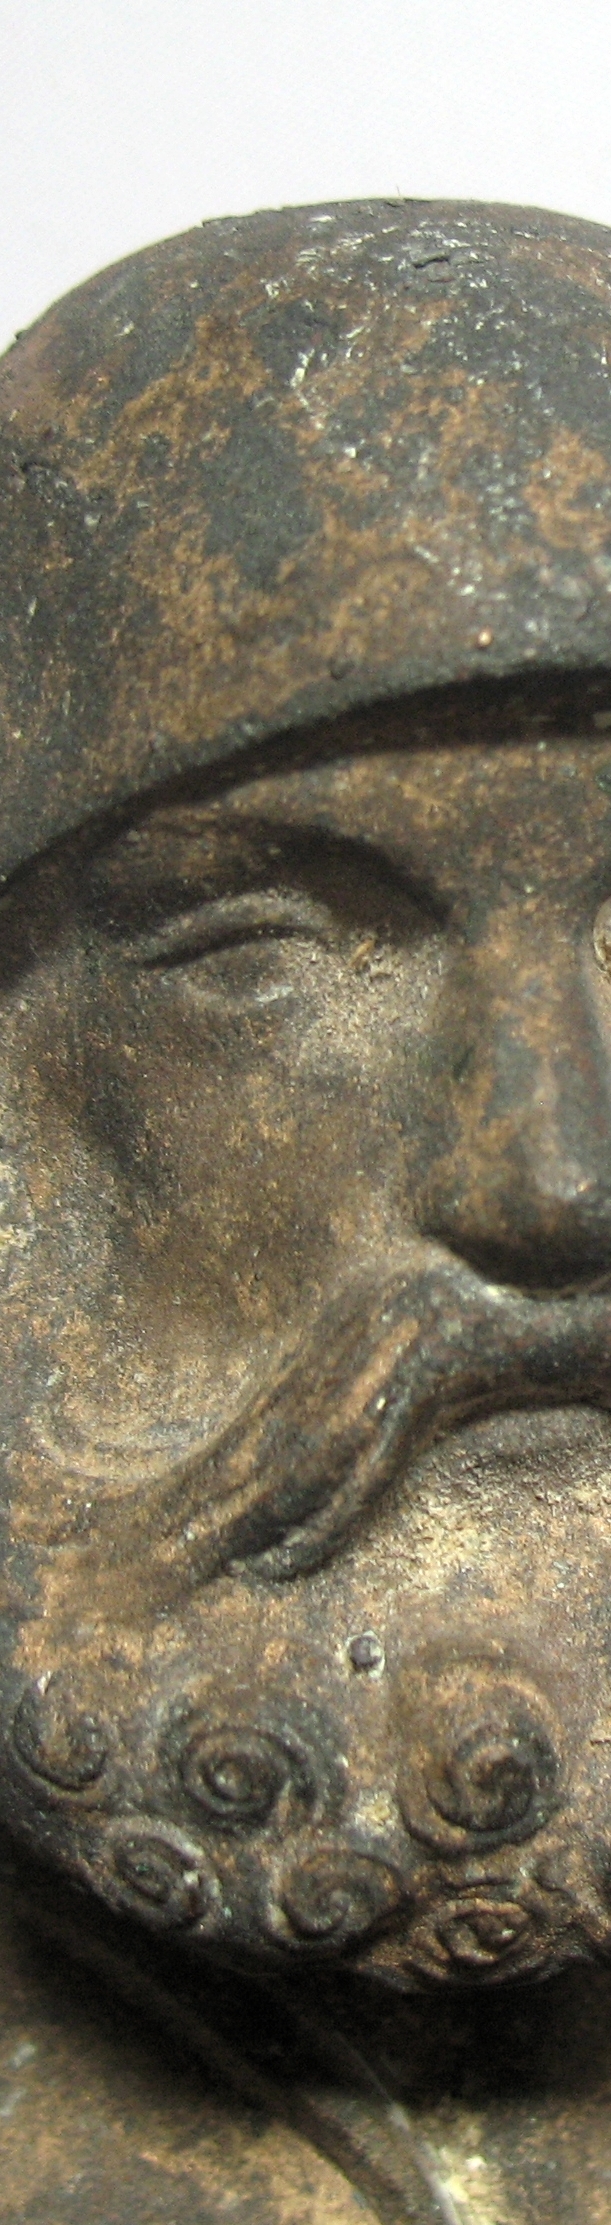
Details of a second cast of a self-portrait of Peter Vischer (1455-1529) from the shrine of Saint Sebald, Nuremberg. Original size of head: 6 cm.
I know the title says Peter Vischer the Elder, however this is a post on one piece of his work only: namely the self portrait of Peter Vischer. When I returned from a fantastic conference on Medieval Copper, Bronze and Brass in Dinant and Namur, Belgium, I remembered that back in the nineties I had to make journeyman’s piece towards the end of my apprenticeship as an artistic bronze founder. This journeyman’s piece is the self portrait of Peter Vischer the Elder, the other two where portrait medals of Martin Luther and Albrecht Dürer, cast in a specialised medal casting technique. The self-portrait of Vischer is located at the front end of the shrine of Saint Sebald. The shrine was commissioned in 1499 and was finished in 1519. Peter Vischer the Elder was granted the title of a master in the Rothschmied Handwerk in 1489. The Rotschmied or Rotgießer could be literally translated as red smith or red caster. Although the name would suggest the Rotgießer were obliged to work with red metals, such as copper and copper-tin alloys only, or the Gelbgießer was obliged to work only with yellow metal, i.e. brass, this was not so: Many Rotgießer were working with brass and/or red brass as well. There was a distinction between the Rot- and the Gelbgießer, though and that had to do with the preferred moulding material: Rotgießer were working with moulding loam and Gelbgießer with moulding sand . Red casters were also casting larger objects than the Gelbgießer. It is most likely that there was no clear cut boundary between the two casting trades.
The self-portrait of Peter Vischer the Elder
Coming back to the self-portrait of Peter Vischer the Elder: Here I show a few aspects of the raw cast and explain why this piece secured me the first prize in the competition of the chamber of handicrafts in Germany: The cast is near flawless. It was cast in one piece in the lost wax technique. There are only four core supports, two of which are the nails seen in the images. The other two were placed in the top of the head and near the bottom of the hem at the backside. The gating system is attached in a manner as to leave the original surface fully intact. I left this piece in this state, because it shows the surface quality that can be achieved. The brownish colour stems from the various oxides of copper and tin, that develop upon contact with the moulding material and form a thin skin, which can be easily removed by ways of filing, scraping, or pickling.
Gelbgiesser. (1789). In J. G. Krünitz (Ed.), Oekonomische Enzylopädie, oder allgemeines System der Staats-, Stadt-, Haus-, und Landwirtschaft, in alphabetischer Reihenfolge (Vol. 16, pp. 736--745). University of Trier. http://www.kruenitz.uni-trier.de/
Fig 1: The use of scientific image processing software allows to quantify the area proportion of each phase in optical micrographs. This is a two step process. The original micrograph is converted to a “threshold map” by modifying the colour channels of the source. The resulting black and white image is analysed for their respective area proportions. The count mask is then produced after quantification and may be used to verify which inclusions have been counted.
I used this method during my PhD thesis to approximate the chemical composition based on a micrograph .
A traditional method for the quantification of an alloying element in another is the estimation of the carbon content of a steel sample. The area of carbon inclusions is estimated by comparison with known standards, or better by measuring them. Area proportions are believed to represent volume proportions and need to be multiplied with the density ρ to calculate wt% proportions. Continue reading
These are the main modes of material removal from a sample.
This is part five of the series on slag microscopy and deals with sample lapping. In the lapping process samples are also ground, but with fine abrasive powders. The abrasive grains can roll between the sample surface and the lapping disc. The section receives a dull finish. Lapping is especially effective in maintaining the flatness of the samples and and edge definition of samples consisting of composite materials with hard and soft components .
For this we need:
lapping disc or a 20 by 30 cm piece of 8 mm flat glass
abrasive SiC powder, e.g. FEPA F800 (ca 6.5 microns)
Sample lapping?
I found that one lapping step between grinding and polishing resulted in better polished sections. It allows allows you to stop grinding after paper grit 1200. This step is very simple to do manually and does not take long:
Squirt a smallish amount of water on your glass lapping plate. Put a small amount, e.g. half a teaspoon, of F800 SiC powder near the water puddle. Now use the sample to draw in some SiC powder into the water and move the sample block in a figure eight motion across the glass plate, drawing in more abrasives as you go along. During lapping the abrasive grains will break down to smaller particles and produce a finer and finer surface. You can see this effect when compare the sample surface that was lapped with fresh abrasive with one that was lapped with old abrasive that was used for a longer period of time. The surface lapped with the old abrasive will be finer.
Lapping does remove less material than grinding. You can,, however, determine the material removal rate by the ratio water to abrasive powder, i.e. the viscosity of the lubricant film. The thicker the film, the less material is removed. If your film gets too thick, the sample will only slip across the plate. If it too thin the sample will get stuck on your plate due to strong adhesive forces.
You will develop a feeling for this process rather quickly. You can also hear it, if material is removed or not…
Recap
Lapping is a simple, optional step
it may shorten prep time, because you do not need to use the finest grinding steps
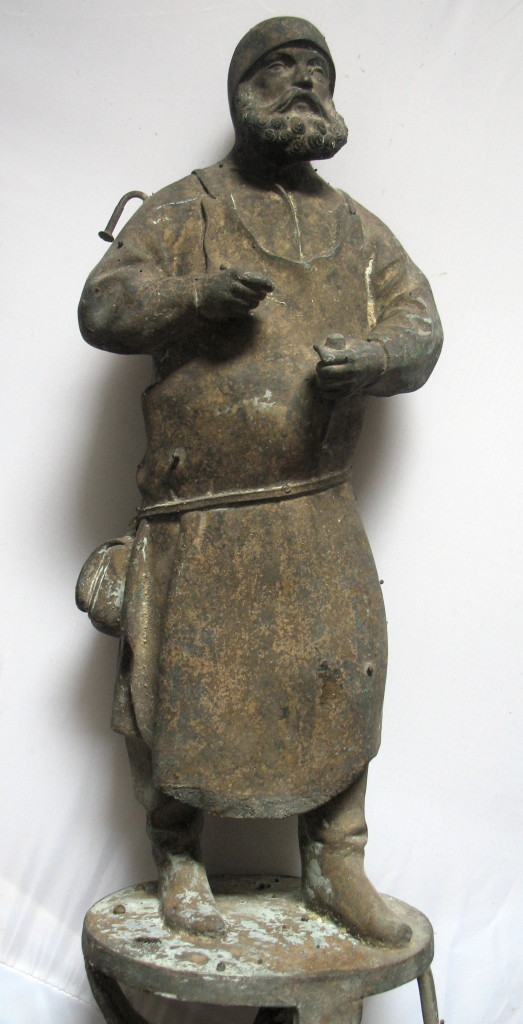 Coming back to the self-portrait of Peter Vischer the Elder: Here I show a few aspects of the raw cast and explain why this piece secured me the first prize in the competition of the chamber of handicrafts in Germany: The cast is near flawless. It was cast in one piece in the lost wax technique. There are only four core supports, two of which are the nails seen in the images.
 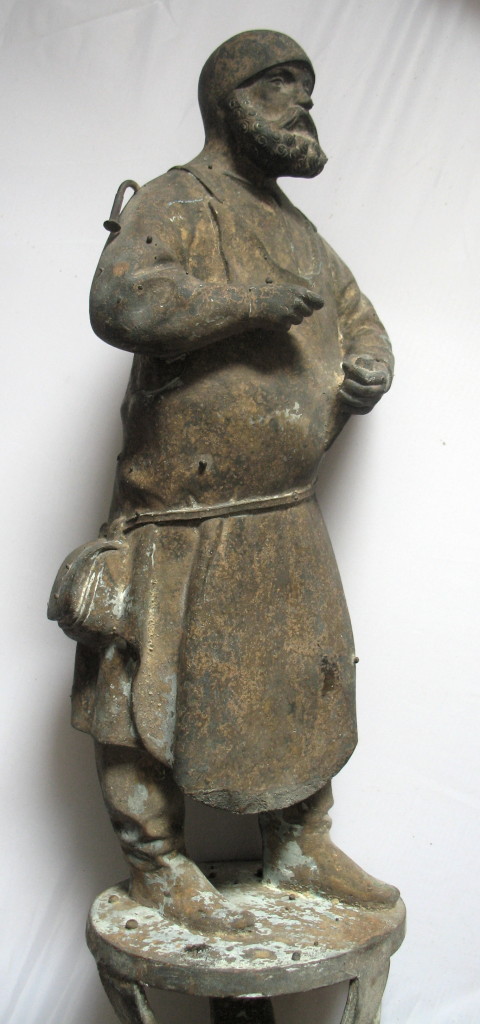 The other two were placed in the top of the head and near the bottom of the hem at the backside. The gating system is attached in a manner as to leave the original surface fully intact. I left this piece in this state, because it shows the surface quality that can be achieved. The brownish colour stems from the various oxides of copper and tin, that develop upon contact with the moulding material and form a thin skin, which can be easily removed by ways of filing, scraping, or pickling.
