Oct
22
2013
Bastian Asmus
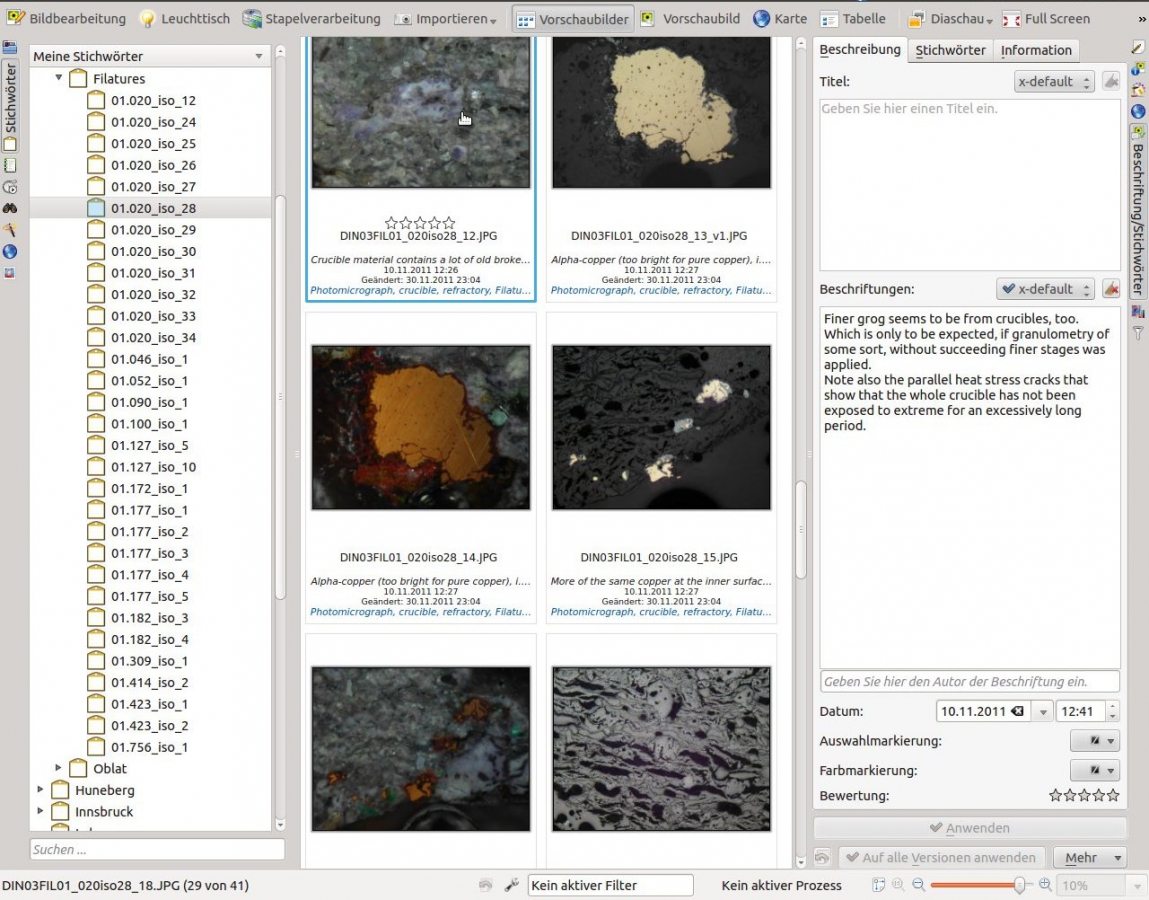
This article is about managing your micrograph collection without the need of a dedicated data base structure. You can keep your filing structure and will not be dependent on a proprietary management system. The article is centred around embedding meta information within the digital image. Micrograph, microscopical observations and related notes are always kept together. Because of the standardised way meta data is stored in digital image files, it may be easily exported.

Ddigikam enables you to save your microscopical observation notes directly into the meatadata of your micrographs.
Continue reading
no comments | tags: archaeology, How to, linux, microscopy | posted in comparative collection, General, Image Meta information, Micrograph, Microscopy
Oct
7
2013
Bastian Asmus
There are a number of Linux software solutions that do tethered shooting, aka remote capture and they do it well. In this article I am describing the difficulties of setting up darktable for tethered shooting with a Canon EOS 600D digital camera on Ubuntu 12.04. Plenty of people managed to do this and I meant to do the same. I was quite surprised when it did not work the way it should have worked.
I am using a Canon EOS 600D digital camera as a microscope camera, because I can put its liveview functionality to very good use. Either to teach or to produce good quality micrographs. If you are using Mac OS X or Microsoft Windows you can use the Canon EOS utility to use tethering to control a digital camera with your PC. However if you like to – or have to – use a brand of Linux you will find that the Canon software does not run with Wine. Of course you could run Windows or OS X on a virtual machine, such as Virtualbox, but that became too cumbersome for me.

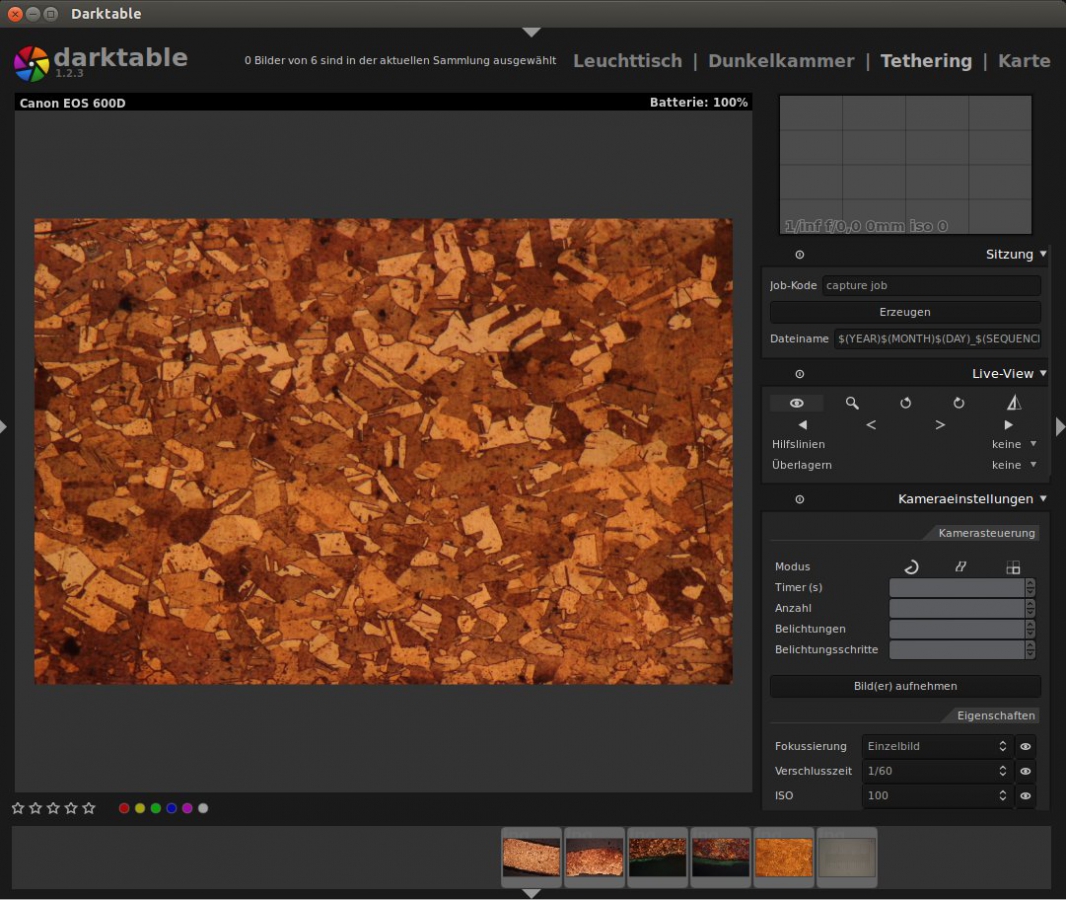
The image shows the darktable interface for tethered shooting. With Canon Liveview cameras the computer may be used to control the camera and take pictures. The image shows a section of an etched copper roof from the 18th century.
My enthusiam for tethered shooting on a linux machine was beginning to wane when I connected my camera to the USB port. All I got was a generic error message:
Unable to mount Canon Digital Camera Error initializing camera: -1: Unspecified error
The camera was not mounted. I could not even get it to work with digiKam to download images. I did check for SD card corruption, updates for all sorts of related software libraries, tried to access the camera with gphoto2. …and nothing did work. Eventually it turned out that the USB 3.0 ports did not work well with the camera. After figuring this out I did find this post which seems to confirm my findings. Plugging the camera into the USB 2.0 port the cameras was mounted as a storage device, however now Ubuntu issued the following error message:
Error (-60: 'Could not lock the device')
After checking for this error I found this post, which solved the problem:
- make sure your camera is connected to a USB 2.0 port
- unmount the camera with your file browser
- start darktable, switch to the “Tethering” tab
- the software should be able to find your camera
Addendum 9.11.2014
If you remove the SD card from your camera darktable will work out of the box as long as you start after you have plugged in your camera. Where there is no storage device the gvfs cannot mount it. Hence the camera is not blocked. Give it a try. 1. If If you are looking for more permanent solutions check this post: Delete or rather rename the following files, so you can undo things if they go wrong:
/usr/share/dbus-1/services/org.gtk.Private.GPhoto2VolumeMonitor.service
/usr/share/gvfs/mounts/gphoto2.mount
/usr/share/gvfs/remote-volume-monitors/gphoto2.monitor
and optionally:
/usr/lib/gvfs/gvfs-gphoto2-volume-monitor
2. Try this solution: remove the execute rights of the following file:
- open terminal
- command: sudo killall gvfs-gphoto2-volume-monitor
- command: sudo chmod -x /usr/lib/gvfs/gvfs-gphoto2-volume-monitor
- close terminal and restart.
These two solutions have the same effect, because they disable the same feature: It prevents gvfs from mounting your cameras SD card as a storage device. So unless you are happy with the fact the camera will not appear in your file browser any more, I would recommend the other solutions. Photo managing software should still be able to find your camera, though.
Well, I hope this helps. Let me know if you found any other solutions.

no comments | tags: archaeology, archaeometallurgy, How to, linux, microscopy, photograhpy | posted in General, Info, Lab work, Micrograph, Photography, remote capture, tethered shooting
Sep
19
2013
Bastian Asmus
Do you work with a lot of Exif data or other meta data, such as XMP or IPTC? Storing Exif data in your images is a good way of keeping information about your photos together with your photos or micrographs. You do know the problem: all EXIF data is suddenly lost, the micrograph is now almost useless without it. This is especially true if you use ImageJ to measure features in your micrographs. However if you were working on copies instead of the originals, as you should always do, all is not lost.
The all mighty Exiftool provides a simple solution:
exiftool -tagsFromFile originalimage.jpg anotherimage.jpg
The -tagsFromFile option copies all metadata fom the original file to another image file.
If you are using some sort of linux installation of exiftool is done with your package management system. For OS X there is a dmg package, for WIN there is an executable available on Phil Harveys website.
Don’t get me wrong, ImageJ is a great piece of software and I use it on a daily basis and will continue to do so. I do hope that at some stage in the future this Exif data bug (or is it a feature?) will be fixed and make this current workaround obsolete.
no comments | tags: archaeology, exif, How to, linux | posted in General, Image Meta information

